Levelling Rasp
Don’t throw away your used rasps and horseshoes. You can build your own levelling rasp!
Here is a rasp with which you can easily make a perfectly flat surface on a hoof for nailing on a shoe.
You still have to know how to shoe a horse with proper medial-lateral balance, proper sole depth, proper foot angle, and appropriate toe length.
Why bother making yourself a ‘levelling rasp’?
I am a journeyman blacksmith and farrier, and when I was shoeing horses full-time, I did not have trouble with getting a perfectly flat foot and didn’t run into trouble with dipping the quarters. However, things are a little different these days. I suppose I’ve probably retired from the profession, but I still like to do my own horses when I need them shod.
I now seem to have trouble getting that very last level to the foot, and I find a slight rock to the foot when I check it with the shoe. Anyone who has shod horses knows that it can be a bugger to get those little waves out and knows how easy it can be to dip the quarters.
Now, if you hot-shoe a horse, this gets rid of any little imperfections and gives you a perfectly flat foot. But you also have to fire up a forge, have propane on hand, and be prepared to take a bit more time.
And that is why I built the levelling rasp.
When I’ve finished the trim and the fit-up of the shoe and am just about ready to nail it on, I’ll give it four or five strokes with the levelling rasp to make a perfectly flat surface upon which to nail the shoe.
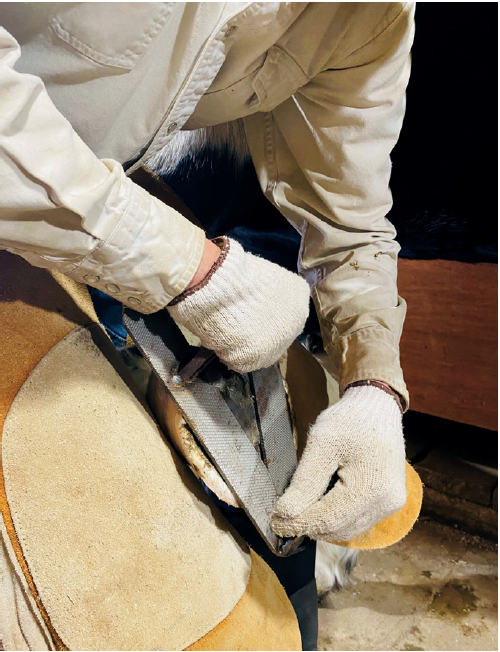
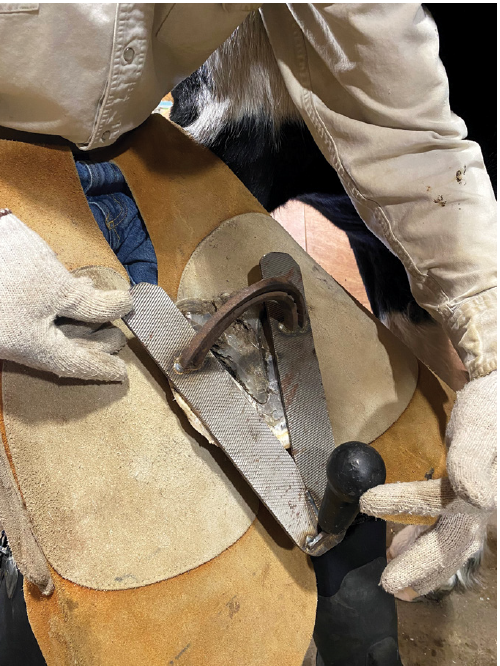
The rasp stays in contact with the whole foot the entire time. You can just put a little more pressure on either the toe or either side of the heel if necessary to maintain hoof balance.
How it’s built:
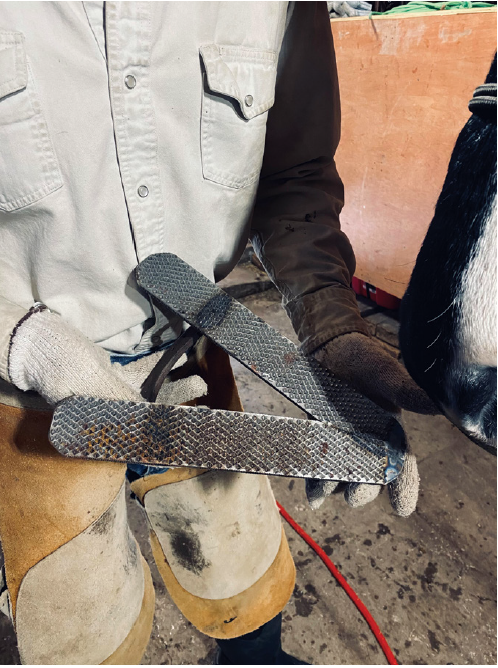
- Take two old rasps, cut the tangs off, and then cut the rasps to join in a V pattern
- Weld them together, making sure they stay perfectly flat and even
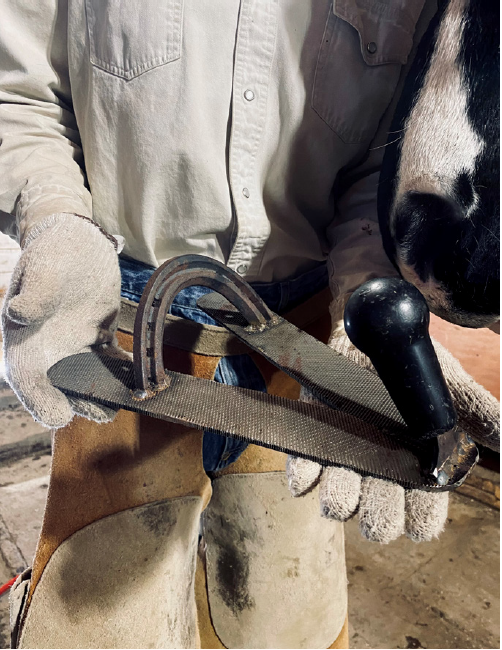
- For the back handle, weld a piece of a horseshoe to the wide end of the ‘V’
- For the front handle, weld one of the tangs onto the narrow end of the ‘V’
- Thread a plastic rasp handle onto the front tang for comfort and safety
The ‘V’ design also allows the rasp to stay in full contact with the entire foot while not hitting the frog.
For me, this is a real time-saver. If you have no rock in your shoe when you nail it on, then you have way better odds of that shoe staying where you put it and not working itself off over time.